|
By: Jesse Williams 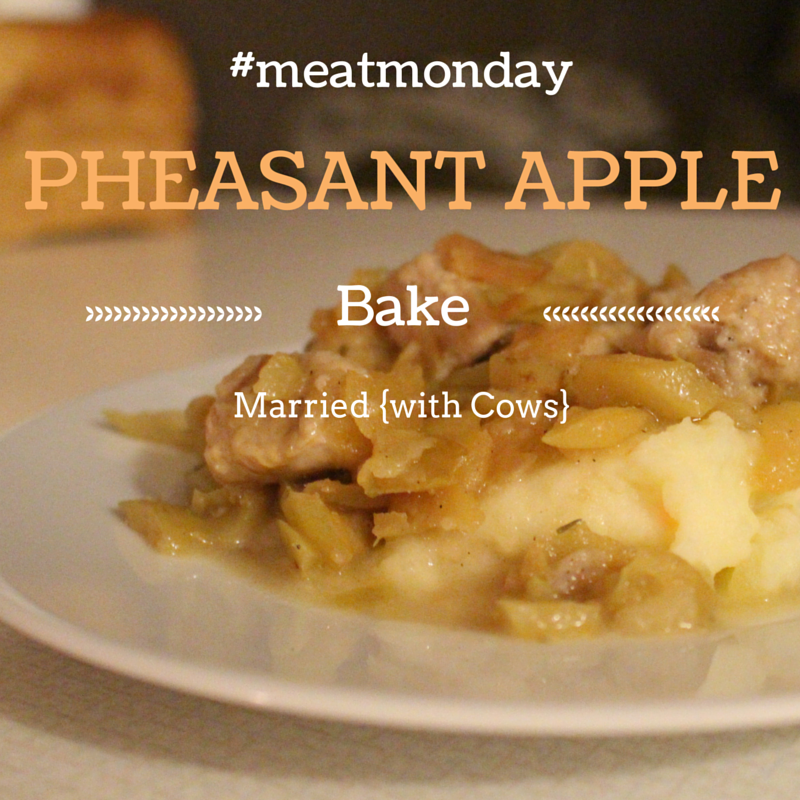 Ingredients
Directions Preheat oven to 350F In a small bowl, combine flour, salt and pepper. Chop the pheasant breasts in to bite sized cubes. Coat each piece of pheasant in the flour mixture and brown all sides of the pheasant on the stove with canola oil. You may want to do this the night before to prepare to cut down on preparation time the day of. Or you could freeze the pheasant chunks for use another day. Remove pheasant chunks to a greased casserole dish. Sprinkle with salt, rosemary and pepper. Add the chopped apples to the dish, as well as the apple cider and wine vinegar. We use apples from my mom's apple tree that we core, chop and freeze each summer for easy use all year round. You can of course use fresh too. Mix thoroughly. Pop the covered casserole dish into the oven for 30-40 minutes at 350F. We usually pair this dish with mashed potatoes, so if throw some in a pot and let your house fill with the delicious aroma of pheasant! You may also like these other #meatmonday recipes...4 Favorite Pheasant Feasts
Peasant's Pheasant Pot Pie Pheasant Sliders Pheasant Fingers Big Game Sausage Easy Smoked Deer Roast
0 Comments
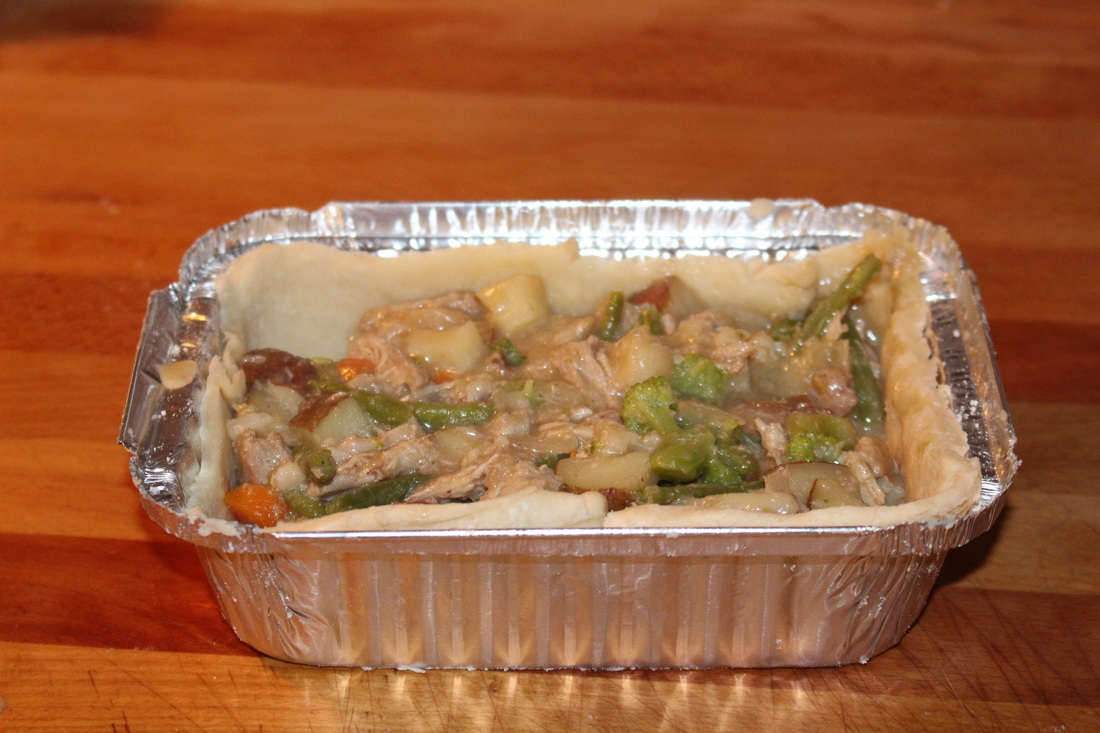
Posted By: Jesse Williams 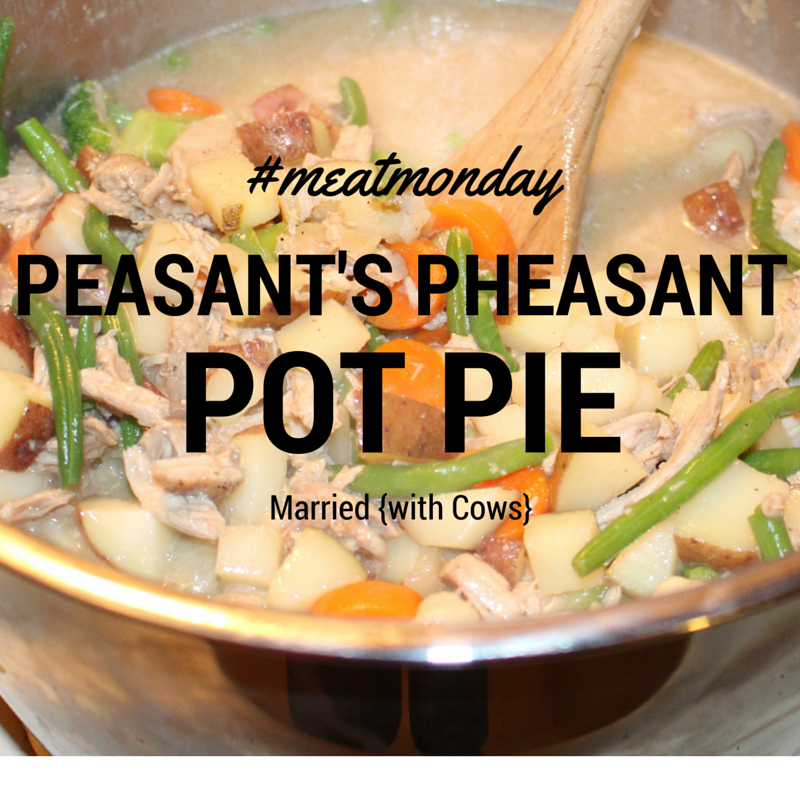 This is based off our favorite chicken pot pie recipe, which you can find here. We simply replaced the chicken with pheasant, and used up all of the extra veggies & potatoes we had in our cupboards. It was a great way to use up all of our extras, including frozen veggie leftovers! Plus, it made some room for our individual pot pies! LIFE HACK: You can bake your pheasant in the slow cooker to easily shred the pheasant before using it in this recipe. Add 4 extra breasts so you can make Pheasant Sliders too! You can easily freeze pheasant sliders and pot pies to stock up your freezer meal supply. Ingredients
Directions Preheat oven to 425. Spray tinfoil pans or dishes with cooking spray. If making your own crust see below for our recipe. If not, you can get various different pre-made crusts that will do the trick. We used home made crusts for these pheasant pot pies, but we couldn't find individual pie shells at our local grocery store, so we grabbed some small rectangular pans that should hold enough to feed the two of us with one pie! In a saucepan over medium heat, melt your butter. Stir in your onion and allow to cook for 3-4 minutes. Be sure to stir often. Add your salt, pepper and flour to the saucepan and gradually add your milk & broth, stirring. Bring to a boil. Add your chicken and thawed veggies, as well as your potatoes. Continue to stir until the sauce thickens. Remove from heat. Scoop your mixture into your pie crusts. This recipe filled 9 small individual pie plates or 7 rectangular larger pans with a pie crust on the top of the mixture with slits to allow airflow. Use your fingers to pinch the edges of the crust. At this point I put the individual pies in the freezer to be eaten later. If not freezing, pop in the oven for 20-40 minutes depending on the size of pie you chose. Crust Ingredients2 cups all purpose flour 1 cup shortening or lard 1 tsp salt Create a slurry with: 1/3 cup all purpose flour 1/2 cup ice water Crust DirectionsIn a large bowl, combine flour and salt. Cut in shortening with a pastry blender until you achieve pea-sized crumbs. In a separate bowl create the slurry of flour and ice water. Be sure there are no lumps. Add slurry to the large bowl, mixing the dough with your hands. Turn dough onto a floured surface and fold the dough onto itself while kneading to create layers. Use a rolling pin to roll the dough out to the desired thickness. I used a bowl that was slightly bigger than the tin foil pie plates I was going to use, to cut the crust. Note: I had to make this particular crust recipe twice to have enough dough to make 9 small individual chicken pot pies. Many recipes only call for a top crust, not a bottom lining crust. If you choose to go that route the above recipe will be adequate for the amount of filling made in step one. If you choose to make one large pot pie the above recipe should be enough for one full top and one full bottom crust. You may also like these other #meatmonday recipes... 4 Favorite Pheasant Feasts
Apple Pheasant Bake Pheasant Sliders Pheasant Fingers Big Game Sausage Easy Smoked Deer Roast Posted By: Jesse Williams 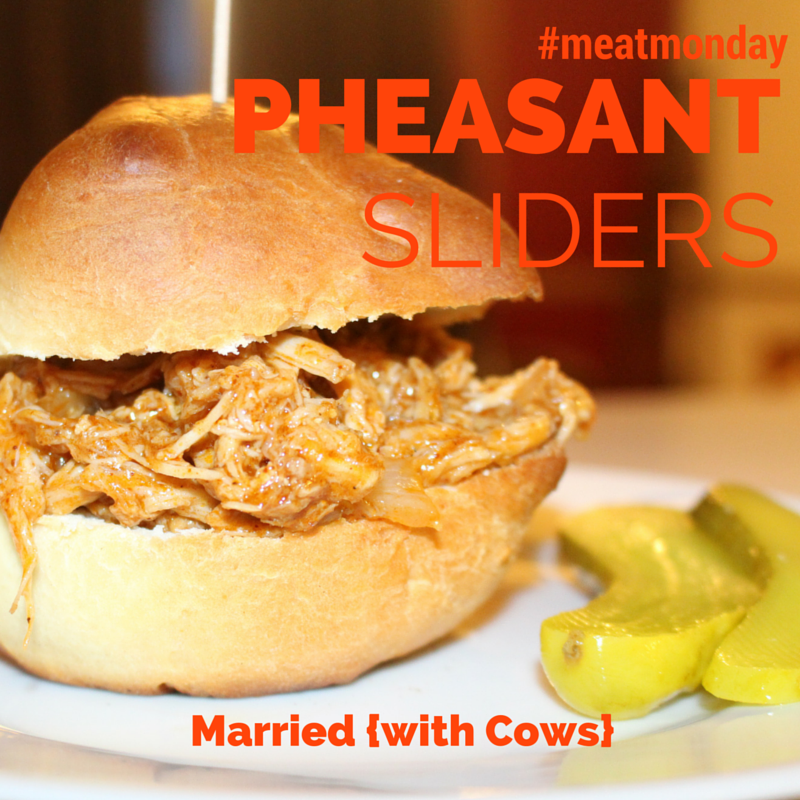 Ingredients 4 pheasant breasts 1 can chicken broth 1/4 tsp salt 1/8 tsp pepper 3/4 cup barbeque sauce 1/2 small onion, chopped 1/2 Tbsp canola oil 1 Tbsp brown sugar Directions This recipe requires some work beforehand to create the pulled pheasant. I like to start the morning we are going to enjoy the dish by cooking the pheasant breasts in a slower cooker on high for 4 hours. Throw in the pheasant breast, chicken broth, salt and pepper. Let simmer until cooked. LIFE HACK: While you are baking the pheasant in the slow cooker, add 4 extra breasts so you can make Peasant's Pheasant Pot Pie too! You can easily freeze pheasant sliders and pot pies to stock up your freezer meal supply. Take the pheasant out of the slower cooker and use two forks to shred the breasts apart until it resembles pulled pork. 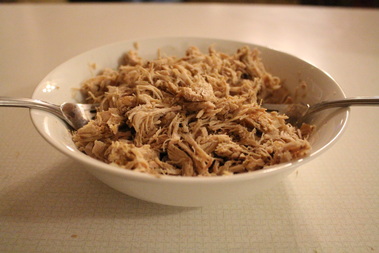 You can now either add the sauce ingredients to the crock pot with the shredded chicken and let it simmer for a an hour or so, or you can make the sauce on the stove. If that's the case, add the onion, barbeque sauce, oil and brown sugar to a pot. Let simmer for 20-30 minutes or until the onions are soft. Add the sauce to your shredded chicken and place on your bun. Enjoy! You may also like these other #meatmonday recipes..4 Favorite Pheasant Feasts
Apple Pheasant Bake Peasant's Pheasant Pot Pie Pheasant Fingers Big Game Sausage Easy Smoked Deer Roast 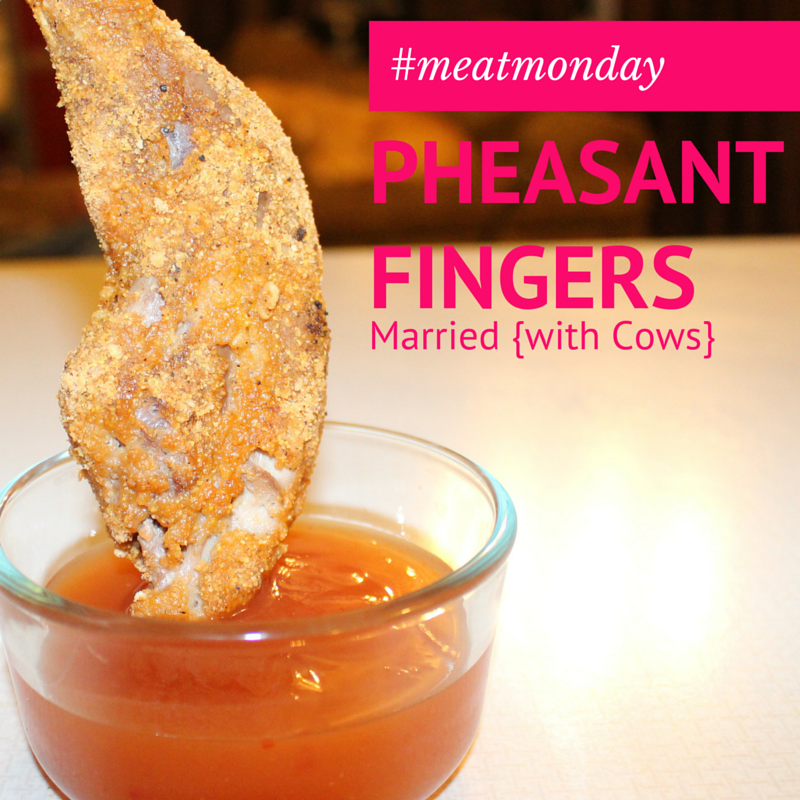 This recipe is pretty straight forward but a quick and easy hit. Ingredients: Pheasant legs or breasts (cut into slices) Shake & Bake flakes Eggs After washing your pheasant legs or breasts (and removing all pellets!) coat with egg and then throw them in a bag of Shake & Bake (purchased or make your own). Lay on a cookie sheet and cook on 400F for 20 minutes or until cooked. You may also like these other #meatmonday recipes... 4 Favorite Pheasant Feasts
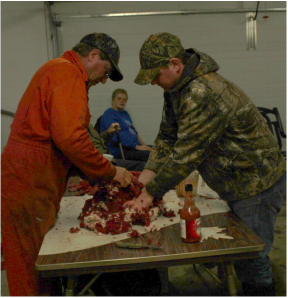
Apple Pheasant Bake Peasant's Pheasant Pot Pie Pheasant Sliders Big Game Sausage Easy Smoked Deer Roast Posted By: Jesse Williams Have you heard of #meatlessmonday? It's a popular hashtag on social media these days, used for advertising dinner recipes that don't include any meat. It has popped up in my news feed a lot lately and I can only assume it has something to do with the rising cost of meat as a protein these days. While we are cattle producers and certainly enjoy a cost reduction on our home grown beef, I cringe every single time I reach for a different meat source at the grocery store. And because I am SO cheap, I try to avoid buying meat at all costs. To get us through the winter, my hubs does a lot of game hunting, allowing us a great variety of protein sources for our diet, without breaking the bank! Over the month of January Clay and I will be posting some of our favorite winter wild game recipes each Monday using the hashtag #MeatMonday. So get your crock pots warm and your smokers ready, because there are tried, true & old fashioned wild game recipes coming your way! 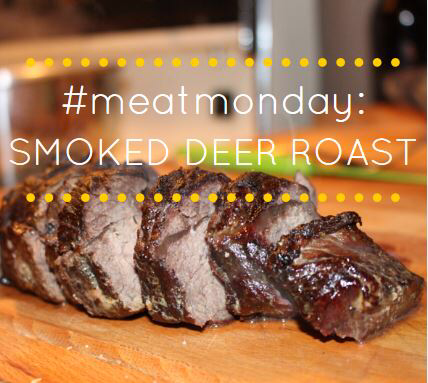 Smoked Deer Roasts Of course this starts back in November, in our area, when you can hunt for mule and white-tailed deer with appropriate licenses within a certain season. Clay was drawn for and shot both a white tailed buck and a mule doe this year. Because of our nice chilly Alberta winters, we are able to skin and hang our deer in an un-heated shop until we are ready to butcher. The carcass stays frozen and is protected from scavengers. To make processing easier, we usually wait for 2-3 friends or relatives to shoot their deer, before we all butcher the animals together. Many hands make for light work, and that way we can share all of the deer between families. We typically divide our meat into two categories; back straps are saved for deer roasts and the rest of the animal is ground for sausage (click here for our Big Game Sausage Recipe). I am sure you could get a lot fancier with your cuts if you wished, but this suits are families just fine. Once off the carcass, the back straps are simply cut into family sized roasts, which in our case, are quite small, seeing how there are only two of us! From there, they go straight into the smoker. Our roasts are typically smoked for 4 hours. They are essentially cold cooked by the time they are taken out, but we really like the smokey flavor and the tenderness it lends. After smoking we package the roasts for the freezer, wrapping them in freezer paper and tape. Don't forget to label them with the date! Oven Baking
BarbequeMore often than not we cook our deer roast on the Barbeque. It's quicker and easier (because that's the hub's domain!) and involved less dishes.
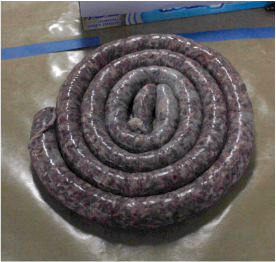
Thaw your deer roast and throw it directly on the Barbeque rack on high heat for 40 minutes to an hour and voila! The outside will be crispy but the inside will still be tender and juicy! We also find that more of the smokey flavor shines through with the Barbeque rather than the oven, but it's all about your preferences. Sometimes we do add some Barbeque sauce to add an extra kick. Posted By: Jesse Williams  Both my family & Clay's are game hunters, so growing up I knew that the new year meant deer sausage making time! It often involved a ton of cousins, friends and neighbours, a fair bit of liquor and a long day of fun. Depending on the tags we are drawn for, we usually butcher 3-5 deer per year and split it between 2 -3 families. Since I got married, we have been making our deer sausage with my brothers-in law, but the same trusty recipe from my mom & dad Baron still holds tried, true & my favorite! Baron Garlic Sausage -100 lb Batch 60lbs of deer/ 40 lbs of pork Each year we seem to waiver on this. Depending on how much fat you keep from your deer, and if you use trimmings, fat or the whole pig carcass, you will want to adjust the ratio of deer to pork. This year we did 70/30 because the pork trimmings were almost entirely fat. Just fry up a patty sample of your mixture and see if you like the fat content. You can always add more deer or pork to your liking. We use the same garlic recipe below for our moose and elk sausage. When I was little, we used to raise our own butcher pigs just for sausage. Nowadays, with an anti-pig husband (sigh!), our best luck is to buy a mature butcher pig from the local Hutterite Colony. Sometimes they will even butcher it for you, or you can take it to a local butcher and have it done the way you like, leaving out the good cuts for your freezer. Spice Mixture (for 100 lbs) Mix together & sprinkle over the ground meat: 1 cup sea salt (or non-iodized salt) 1 cup black pepper 1 cup garlic salt 1/4 cup tender quick Add to meat after the dry ingredients: 1 1/2 cups minced garlic in 3 cups of boiling water* **This is my mom's trick. Soak the minced garlic (you can buy it minced at the store, or spend hours peeling & mincing yourself) in the boiling water. We do these up a bit ahead of time, put the 3 cup mixture in jars and let the water infuse with the garlic. The liquid helps to mix the ingredients together, and the temperature helps keep mixing hands warm, especially when the ground meat was frozen previously! You can add more boiling water if needed to make the meat easier to mix.
Casings Mom says the best casing are sheep gut casings and we have a tradition of getting them from Brooks Meat Packers, a local butcher shop. We seemed to have had the best luck there, as other sources have given us casings that broke very easily and made sausage making a nightmare. I am sure there are many different types and sources that work, but we tend to stick to what has served us well in the past. Soak your thawed casing salted water prior to use. Keep them in the water until you are about to thread them onto the sausage press. Don't allow them to dry out.
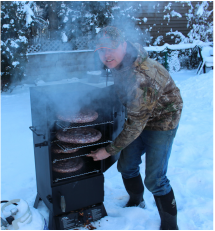
Smoking
PackagingSome people get fancy with their packaging using vacuum sealers, but even doing 3 or 4 deer per year, we always run out before the year ends, so paper packing works just fine for us. If you are planning on keeping your sausage for long periods of time in the freezer, maybe a vacuum sealing system would be better for you to prevent spoiling. 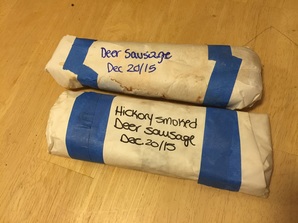 We purchase freezer paper (paper on one side, wax on the other) from our local grocery store. You can usually buy it in 50 ft rolls. For 300 lbs of sausage this year, we used about 250 ft of paper, however it will vary based on your wrapping technique and size of packages. Tape seems to be a big issue for us. You can purchase Freezer Tape which is specifically made for wrapping items for the freezer. It looks like regular masking tape, but trust me- masking tape doesn't work! The second it hits the freezer it loses its stickiness and just falls off! I had some freezer tape left over from a few years ago, stored in cold storage (our c-can), and when I took it out to use this year I was very disappointed. Apparently it cannot be frozen (prior to use). It wouldn't even come off the roll! So if you do manage to find the elusive freezer tape, store it inside for next time! I have purchased Freezer Tape at our local grocery store before, however this year it was impossible to find. You may want to try you local hardware store or Canadian Tire, although it can be quite tricky to get a hold of. Because we were low this year, we tried a number of different tapes. All-Weather Scotch tape (blue) seemed to work great. We actually found it in the painting section at Canadian Tire. It looks a lot like painting tape. We also tried a very thin, plastic sealing tape recommended by our local hunting store, but it was hard to use, and had to use a lot of it to make it to stick. LabelingWe don't do anything fancy here. We just use permanent marker to write the type of deer sausage it is, and the date. This way we can identify how old something in the bottom of our freezer is (although we never seem to have to worry about freshness when it goes so fast!). After all that work, now sit back, kick your feet up and enjoy the fruits of your labor! We would love to hear your feedback, comments or suggestions if you make your own deer sausage. We are by no means experts, but we do have a ton of fun and get a lot of satisfaction knowing we have a freezer full of meat to enjoy all year round. Cook up a batch & enjoy! You may also like these other #meatmonday recipes...
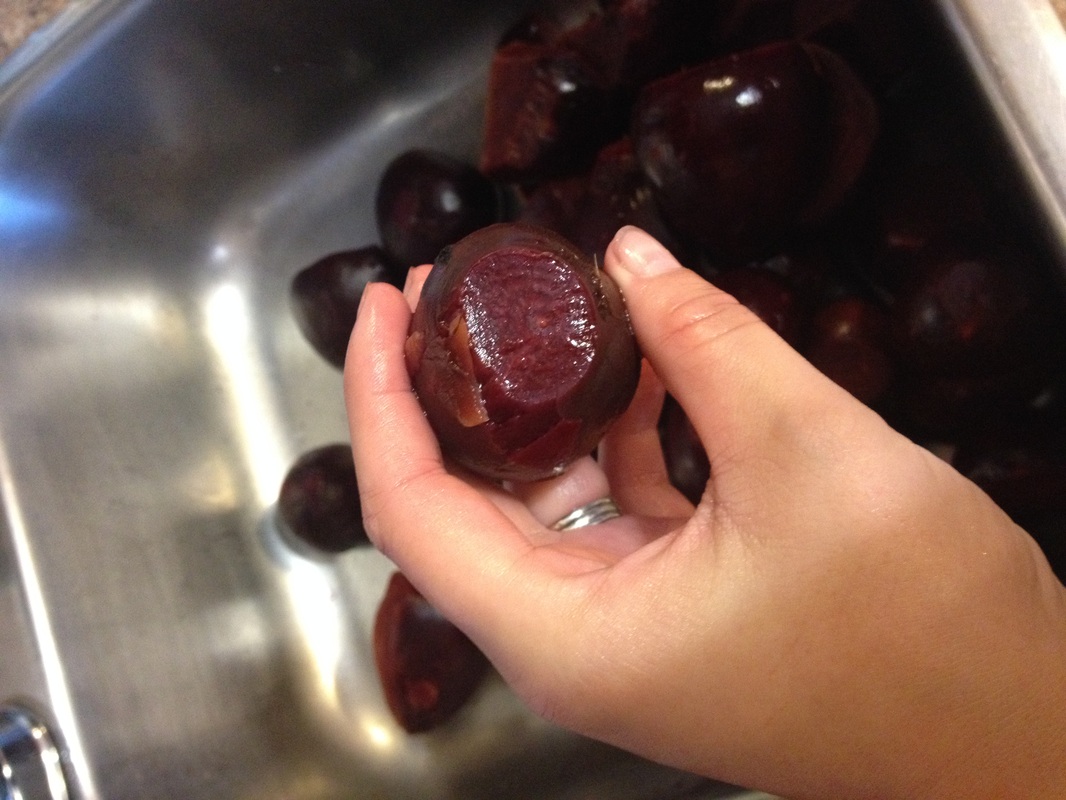
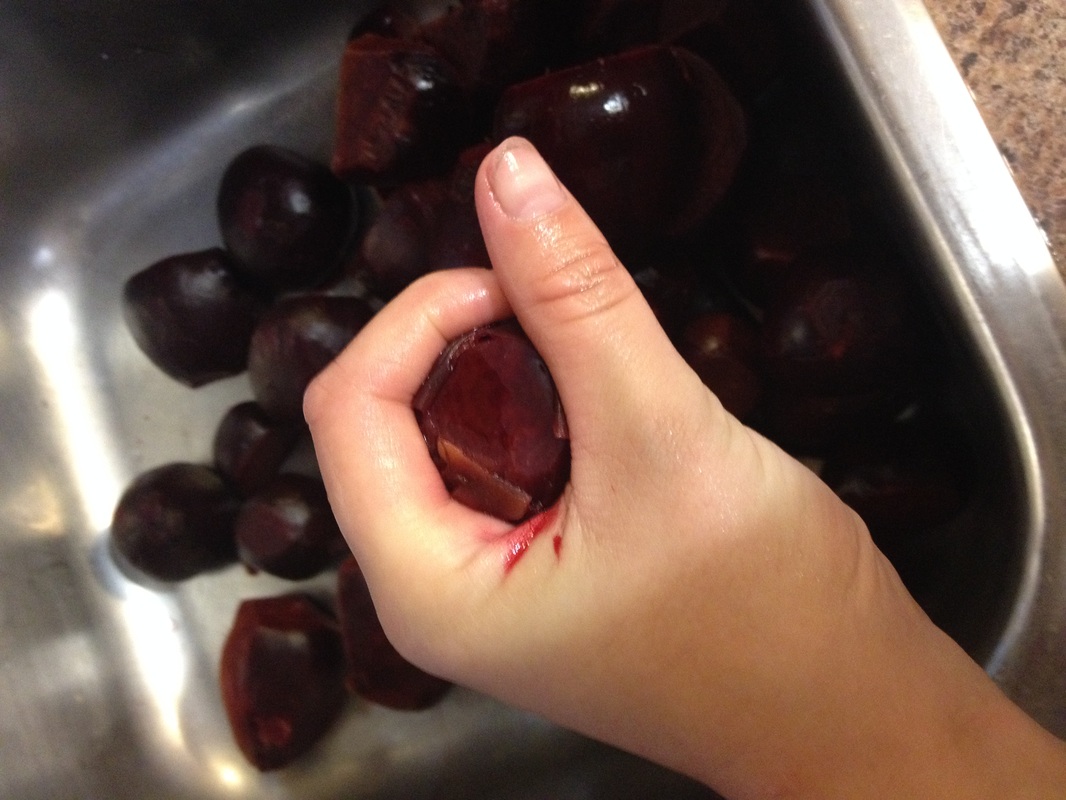
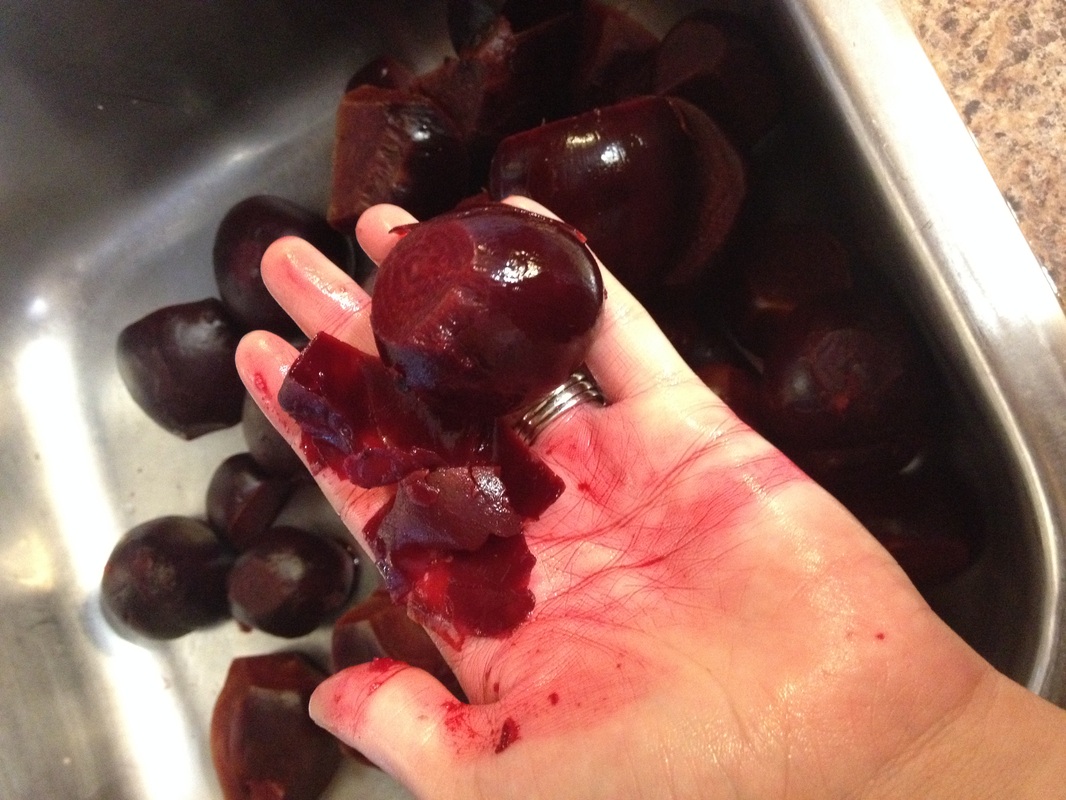
Beets are one of our favorite things to grow in our garden. Try some of the below recipes for preserving these delicious red veggies! Freezing Beets This is this simplest of preservation recipes... 1. After picking your beets, remove the tops, bottom 'tap root' and any scabs. 2. Wash your beets in the sink. A lot of people will argue that you shouldn't cut the beets, saying that keeping the beets whole will prevent them from bleeding and keep more of the nutrients in the veggie. I like to wash and cut my beets first because I use the beet water to make jelly and prefer not to have dirt or scabs on my toast! But do as you wish. 3. Boil the beets in a large pot until tender. Depending on the size, this may take 30-50 minutes. Put your beet water aside. Don't throw it out! NOTE: Your kitchen will look like somebody butchered a cow- there will be red beet juice EVERYWHERE! To minimize the splatter, boiling over & months of smoking oven elements, try this SUPER HANDY Epicure 'Silicone Spill No More'. It prevents your pots from boiling over and the $25.00 it costs is SO WORTH IT! Not just for beets, but for anything and everything you boil! You can check it out online at: http://www.meganblack.myepicure.com/en-ca/shop.aspx 4. Cool the beets by removing them one by one from the beet water and placing them in ice cold water. As soon as you can handle the temperature of the beets, begin peeling them. 5. By placing them in the ice water, you should be able to essentially 'squeeze' the entire peel off of each beet, as per the pictures below. If you wait too long, peeling will become more difficult. 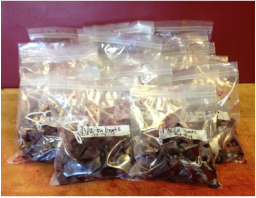 6. After peeling the beets, allow them to cool further. You can then cut to your desired shape & size. In the past I have used a food processor as I had large quantities of beets. This does work but it will make your pieces rather small. If you want bigger pieces, get out our knife and start chopping! 7. I like to portion about 1.5-2 cups of beets per ziploc bag. This is enough for my family of two. Choose whichever you like & will use. 8. Either vacuum seal (if you are lucky enough to have one!) or use a straw to suck out any extra air in the bags. This will help your frozen beets last longer. Don't forget to label the bags with the date. 9. Throw them in the freezer and enjoy home-grown veggies all winter long! Beet Puree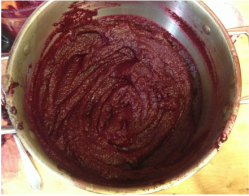 Pureeing beets was a new adventure for me this year. After seeing multiple recipes on Pinterest about adding beet puree, I decided I would try it. 1. I followed steps 1 through 6 above, washing, boiling and peeling the root vegetables. 2. I then simply chopped them up small enough to fit in my favorite kitchen item- the food processor. Because the beets are relatively dry, I did end up adding a few cups of beet water to the mixture. The photo to the left is what my beet puree looked like. Beet Jelly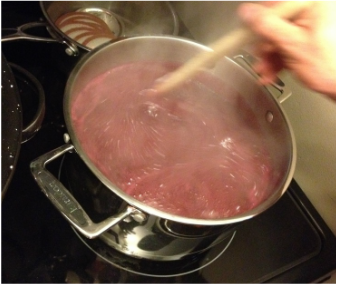 After boiling so many beets and seeing the vibrant red water left in the pot, I just couldn't throw it away! I went to Facebook and asked my friends if they had any great recipes for beet cooking water. My Aunt sent me this DELICIOUS beet jelly recipe...
Bring to a boil: 4 cups of beet water 1.5 packages of Certo 4 Tablespoons of lemon juice Add: 1 package of grape Jell-o 4 cups of sugar Boil for 6 minutes. Pour into clean jars & seal. This recipe was way too easy! And the jelly actually tastes GREAT! I must admit I was very reluctant to put beets on my morning toast but the sugar and jell-o help to keep the jelly sweet. And the color is just vibrant! ENJOY! 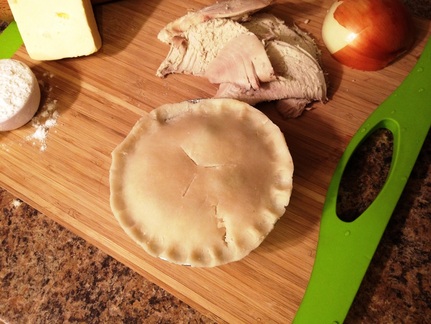 After cooking a savoury much-too-large-for-us chicken this week, I set out to make some freezer meals with the left over chicken. I made these delectable chicken pot pies from scratch, with veggies frozen from my garden this last summer and homemade pie crust! The small portions would make a perfect meal to pop into the oven during those long, cold days (and nights!) during calving season. I hope you enjoy!
Chicken Pot Pie Filling: 1/3 cup butter, unsalted 1/2 cup chopped onion 1/3 cup all purpose flour 1/2 tsp salt 1/4 tsp pepper 1 3/4 cup chicken broth 1/2 skim milk 1 lb cooked, shredded chicken 2 cups peas 2 cups corn 2 cups carrots, chopped 2 cups potatoes, chopped Directions: 1. Preheat oven to 425. Spray tinfoil pans or dishes with cooking spray. If making your own crust see below for my recipe. If not, you can get various different pre-made crusts that will do the trick. 2. In a saucepan over medium heat, melt your butter. Stir in your onion and allow to cook for 3-4 minutes. Be sure to stir often. 3. Add your salt, pepper and flour to the saucepan and gradually add your milk & broth, stirring. Bring to a boil. 4. Add your chicken and thawed veggies, as well as your potatoes. Continue to stir until the sauce thickens. Remove from heat. 5. Scoop your mixture into your pie crusts. This recipe filled 9 small individual pie plaPut a pie crust on the top of the mixture with slits to allow airflow. Use your fingers to pinch the edges of the crust. 6. At this point I put the individual pies in the freezer to be eaten later. If not freezing, pop in the oven for 20-40 minutes depending on the size of pie you chose. Crust Ingredients: 2 cups all purpose flour 1 cup shortening or lard 1 tsp salt Create a slurry with: 1/3 cup all purpose flour 1/2 cup ice water Directions: 1. In a large bowl, combine flour and salt. Cut in shortening with a pastry blender until you achieve pea-sized crumbs. 2. In a separate bowl create the slurry of flour and ice water. Be sure there are no lumps. 3. Add slurry to the large bowl, mixing the dough with your hands. 4. Turn dough onto a a floured surface and fold the dough onto itself while kneading to create layers. 5. Use a rolling pin to roll the dough out to the desired thickness. I used a bowl that was slightly bigger than the tin foil pie plates I was going to use, to cut the crust. Note: I had to make this particular crust recipe twice to have enough dough to make 9 small individual chicken pot pies. Many recipes only call for a top crust, not a bottom lining crust. If you choose to go that route the above recipe will be adequate for the amount of filling made in step one. If you choose to make one large pot pie the above recipe should be enough for one full top and one full bottom crust. Happy Cooking! 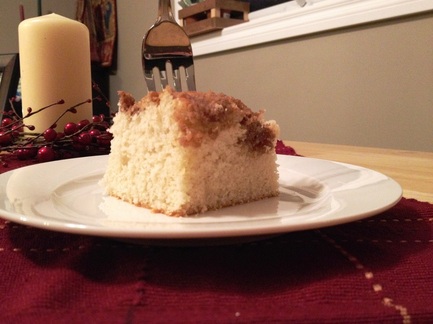 I don't know about your place but at ours, we get coffee-ers. I am not sure if that is a universal rancher term, or just a Williams term, but coffee-er's are your neighbors, friends and family that frequently stop in just to have coffee and chat about the communities happenings. And when you get coffee-ers you need a good treat- and what's better than home-made coffee cake!? This is another Pinterest recipe so click here if you would like to see the original link.
RECIPE Cake: 1 egg 1/3 cup melted butter or margarine 1/2 cup milk 1 tsp vanilla 1 1/2 cups flour 3/4 cup granulated sugar 2 1/2 tsp baking powder 1/2 tsp salt Topping: 1/4 cup flour 1/4 cup unsalted butter 1/2 cup light brown sugar 1 tsp ground cinnamon Preheat your oven to 375 degrees Fahrenheit. Combine the egg, milk, vanilla, butter and sugar with your stand mixer. In a separate bowl combine your flour, baking powder and salt. Slowly add the dry ingredient mixture to the wet ingredients in the mixer. Blend well. Taste the dough- this is important as the dough is oh so very tasty! To make the topping, in a separate bowl, combine the flour, butter, brown sugar and cinnamon. Use a pastry blender to create a crumbly mixture. Grease a 9 x 9 glass baking dish. Add the dough. Sprinkle the topping on top of the dough. Put the dish into the oven for 25-30 minutes or until an inserted tooth pick comes out clean. My coffee cake took about 35 minutes so don't be afraid to leave it a little longer. Cool, slice & enjoy around the table with your coffee-ers! I came across this recipe for melt in your mouth pumpkin cookies on pinterest and would like to pass it on to you on this miserable rainy day (I thought FALL was coming, not spring?). These cookies are a sweet delight for the upcoming colder months and the best part is that it uses up more of my home grown pumpkin puree!! Are you getting sick of pumpkin recipes from me yet?! A few notes: this recipe is HUGE! It made about 60 cookies, so you may want to half it or freeze some of the cookies for later. Also, in my opinion the frosting is a MUST - the cookie itself is not bursting with flavor, although the cinnamon and nutmeg add a nice light taste. The frosting is really what makes these cookies such a treat. The link to the website I got the recipe from is here, but I have explained all of the directions below. 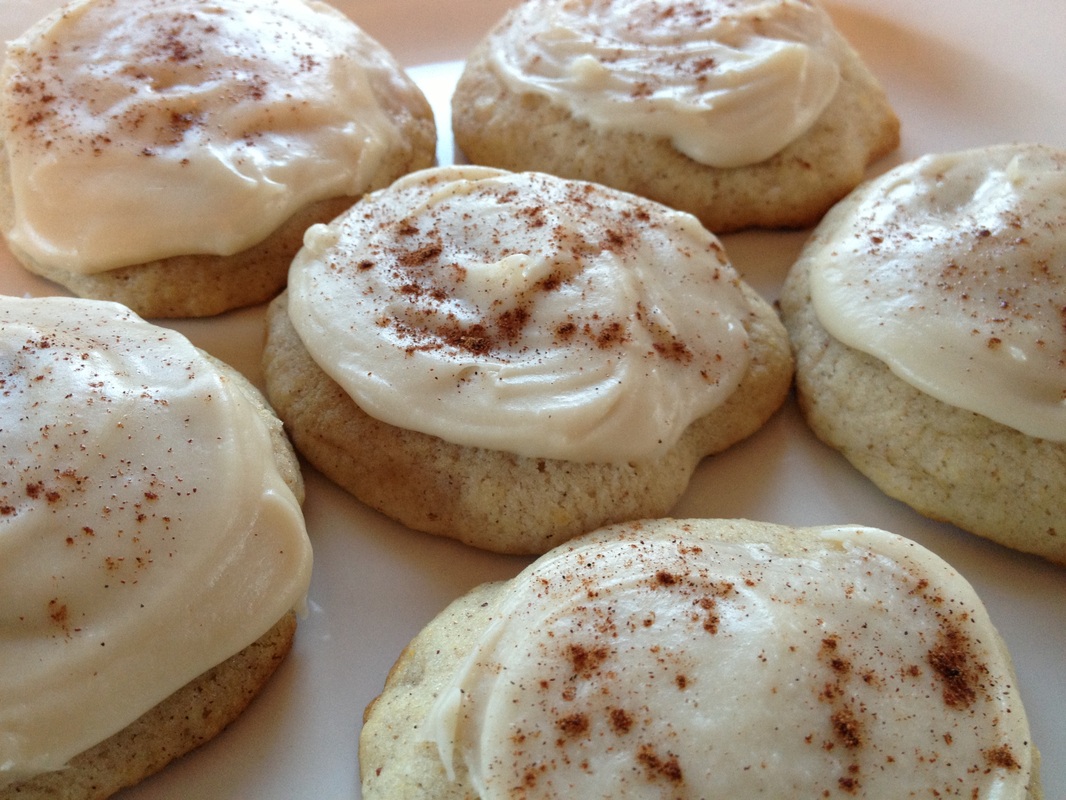
These Pumpkin 'Cake' Cookies are moist, sweet and literally melt in your mouth!
Recipe:
Cookies: 2 cups butter, softened 2 cups granulated sugar 2 tsp baking powder 2 tsp baking soda 1 tsp salt 1 tsp ground cinnamon 1 tsp ground nutmeg 2 eggs 2 tsp vanilla 1- 15 ounce can of pumpkin (or 2 cups of home made pumpkin puree!) 4 cups all purpose flour Frosting: 1/2 cup butter 1/2 cup packed brown sugar 1/4 cup milk 1 tsp vanilla 3 to 4 cups of icing sugar ground cinnamon (to sprinkle on top) Directions: -Preheat your oven to 35o degrees. -Add your softened butter to your stand mixer, beat for about 30 seconds until smooth. Add sugar, baking powder, baking soda, salt, cinnamon and nutmeg. Blend well. -Add in your eggs and vanilla. Blend well. Combine your pumpking puree. Warning! At this point your dough will look like curdled milk- dont worry! Once you add the flour it will start to look normal again. -Add the flour in. Because this recipe is so big your stand mixer may not be able to blend all the flour in. If this happens, get out that old wooden spoon and get mixin'! -Drop onto a cookie sheet with a cookie scoop or a teaspoon. Bake for 10- 12 minutes (Make sure your rack is in the middle or middle-top of your oven. My cookies only took 10 minutes.) -For your frosting, heat the butter and brown sugar in a sauce pan until melted and smooth. Transfer this to your stand mixer bowl, add in your vanilla and milk. Now you can begin blending in your icing sugar. Whip until smooth and you get the desired consistency for your cookies. I used the full 4 cups of icing sugar for my cookies. -Once your cookies cool, frost them, sprinkle a little cinnamon on top, grab a cup of your favourite coffee and enjoy this sweet autumn delight! |

A Blog About Our Life, Love & Lessons Learned on the Ranch
Categories
All
in the mediaArchives
February 2024
|